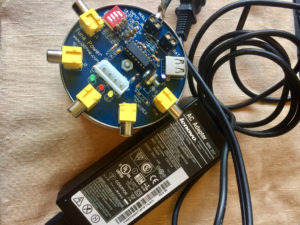
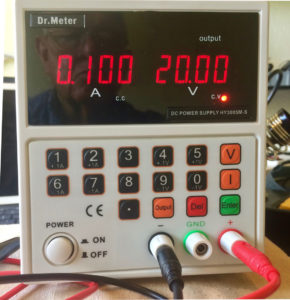
I first used the VOM to check continuity and resistance values at various places according to the circuit diagram. I got all of the expected readings. I then inserted the IC chip, connected up the Dr. Meter power supply setting the output voltage to 20 volts and the maximum amperage to 500 milliamps and turned on the Dr. Meter output. I was getting only about 5 volts into the TPS at a constant current setting. I upped the amperage to 1 amp and tried again. This time I got 20v input to the device, no smoke or shorts, and voila! 13.8 volts at the appropriate outputs and 5 volts ad the appropriate jacks. The IC stayed nice and cool.
Next step was to hook up the 20v wall wart power supply I picked up at a thrift store. This was a power supply for a printer and advertised 20v output at 4.5 amps. Again, the VOM read 20v input and 13.8 volts output at all the right places. And the IC stayed cool.
We’re ready to move onto the next two devices. I’ve got a Rexwood 1000 Receiver kit from QRPME.com. I’ve got that kit started and am ready to test the audio output section.
I also have a Pixie 40m Transceiver kit that I bought from Banggood.com for $3.82. This one comes with a PC board and components. No instructions or other information. There are some pretty good pictures on the Banggood.com site, so that will help with the build process. Capacitors are the most difficult for me to read, even with a 20x magnifying glass. To help with that I bought a capacitance / inductance meter also from Banggood.com. This wasn’t a kit, so I don’t have to put it to use before using it to figure out what the values are of each of the capacitors in the Pixie kit. I can read the resistors with my VOM.
Onto something that should receive RF and transmit as well as receive!